How to use Crusader - Tips and Tricks
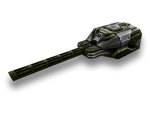
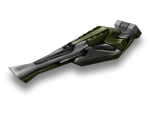
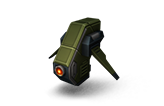
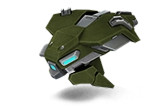
With light hull Hopper and heavy hull Ares already in the ever-expanding list of the new hovering hulls, now there is a new hull called Crusader on the scene. This one is a medium hull and also the third hovering hull added to the game. It has some similarities like the other medium hulls such as Hunter, Viking, and Dictator, but also has plenty of other unique features. In this article, we’ll take an in-depth look at this new hull and share some tips and tricks to use it effectively!
Basics
This tank, just like Ares and Hopper, can not be flipped easily. It can go off bridges and cliffs with ease and not flip unless you are stunned by a Hunter or Hopper’s Overdrive. Crusader is also tied with Mk7 Dictator in slowest top speed, but since it hovers, it can do a lot more than what other medium hulls can do. This hull is classified as a medium hull because it has just about the same parameters as any of the other medium hulls.
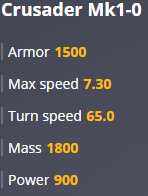
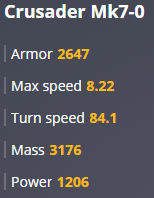
Crusader's statistics
This hull also shares the same “universal hull augments” that are normally available for all the other hulls (check them out here).
Overdrive
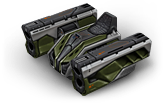
Just like all the other hulls in the game, Crusader comes with a unique and powerful Overdrive. It has a cryo generator installed in it which creates a big armor-piercing icicle. Hitting your opponents with this chunk of ice does a lot of damage. If it does not destroy them, it will freeze their tank and apply the armor-piercing status effect which will make them an easy target. Also to note, the icicle shoots at a very fast rate compared to the similar slow BFG from Ares's Overdrive, but both are deadly.
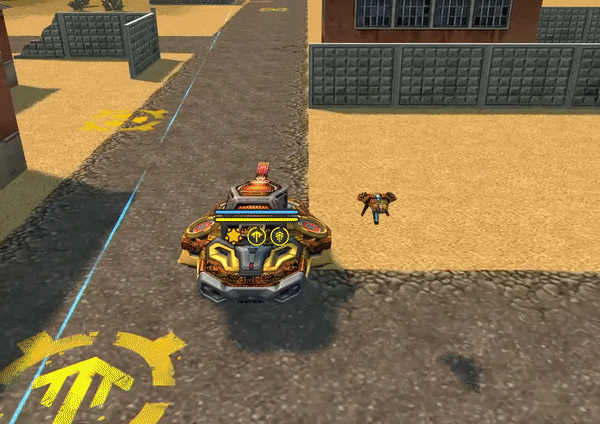
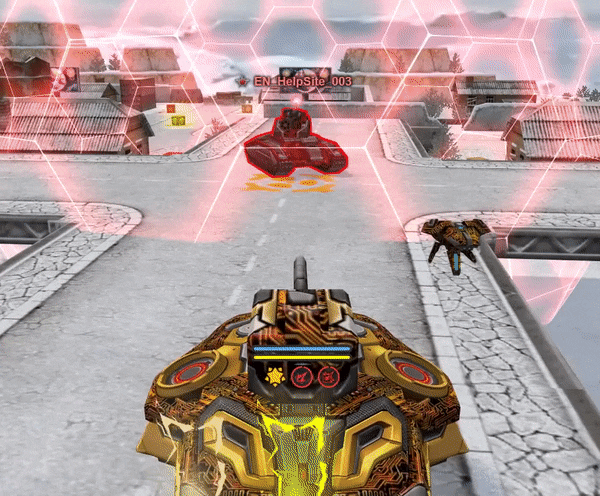
Crusader destroying multiple tanks
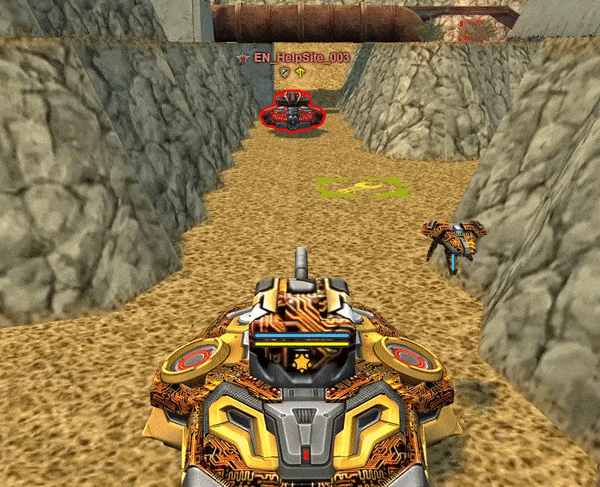
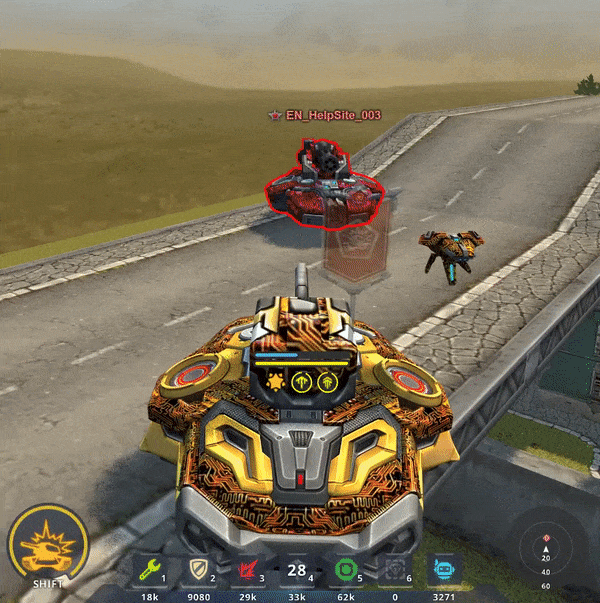
Crusader OD not fully destroying the tank but making them Frozen and AP status
Because this Overdrive causes the armor-piercing effect, it works perfectly against opponents inside a Titan’s dome shield. So shooting Crusader’s Overdrive icicles into it will make any tank inside of it an easy target.
When an icicle is shot from the cryo generator that's installed in the hull, it has a lot of impact force and knocks you back a little. So if you’re in a bad situation near a cliff or on a bridge, simply use Crusader's Overdrive to damage your enemy and make a quick getaway.
Ways to charge Crusader's Overdrive:
- Capture a flag.
- Assist a flag capture.
- Score a goal in Rugby.
- Assist a goal in Rugby
- Heal teammates with Isida.
- Destroy an opponent.
- Assist in destroying an opponent.
- Capture a point in Siege.
- Assist in capturing a point in Siege.
- Capture a flag in Assault.
- Destroy a Juggernaut.
- Assist in destroying a Juggernaut.
Crusader's Overdrive can be used well for team battles because of the splash damage and rate of speed it has. It can also be used well alone for your own use if you’re in a Deathmatch or going for Gold Boxes, as you can easily destroy anyone with ease and catch them all for yourself.
Tips and tricks
So now that we have discussed the basics and the uses of its Overdrive, let’s discuss some of the useful ways to use this hull with different turrets or combinations that go well with it, which would in turn hopefully help you do well in your battles. Let's begin!
Turret pairing:
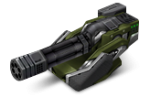
Vulcan - This turret is very popular with Dictator and Hunter as it can be used in medium to long-range combats, meaning it’s a perfect fit for Crusader. If you have the Heat Immunity augment for this hull, you can shoot non-stop without inflicting damage to yourself. You can also pair this augment with Vulcan's Incendiary band augment and do some devastating damage to other tanks.
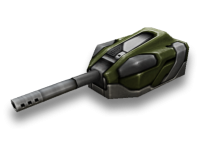
Smoky - Using Smoky is a great choice as it has the ability to do some serious damage in short to long-range combats, making it a great pairing with Crusader. Most Smoky users use the 'Autocannon' augment that allows the turret to have an extremely fast firing rate at the cost of some damage dealt. Since Crusader can hover, you can strafe sideways (using mouse controls) to knock your opponent's aim off, even more.
Railgun - Another popular turret that most Tankers love to use with medium hulls is Railgun. Since Crusader is also a medium hull, it will go perfectly with it, and you can also endure a lot of damage with the more armor your tank has. Also, using Railgun's Electromagnetic accelerator "Scout" augment is a perfect option for this pairing.
Striker - This turret is a really great pick to use with Crusader as it has good maneuverability and you can lock your aim on your opponents to launch a salvo of rockets very easily. It is recommended to use Striker on a map that has not so many obstacles on it though, as you'll most likely find yourself trying to send a salvo of missiles at your opponents instead of doing normal shots to send just one each time.
Freeze - Freezing to slow down your opponents can really help ensure you have a higher chance of survival and taking them down. Though you may typically see Freeze being used with light hulls, it's also great to use with any hovering hull as you can have better movement compared to your opponents while freezing them.
Drones
Now you have most likely chosen a turret to use, but you still got to ponder about which Drone is going to give your tank that last finishing touch and make you successful in your battles. Let's begin.
Mechanic - This is a very helpful and supportive Drone, you can use it to heal you and your nearby allies. Crusader has quite a bit more health-points compared to the other hulls and can move around a lot more effectively healing surrounding teammates, making it a great use with it.
Defender - You can use this Drone heavily on defense, as it makes your tank much stronger against your opponents. The extra armor boost it gives to Crusader almost makes it have as much armor as a heavy hull has, making it a very good choice to defend or even attack your opponent's base to win the game.
Crisis - Considering how this Drone works, there's not much to say at all. It can be used for almost any instance. You can either capture flags with the extra speed boost it gives or simply hang around and defend your base with boosted armor and withstand lots of shots. Anyhow, it is the rarest Drone in the game and not everyone has it.
Any Drone can go well with any hull, it just depends on how you play, whether it's passive or aggressive. Hopefully, you can use some of the following helpful tips to decide which drones are the best to use for Crusader.
Tips
- Remember you are almost impossible to flip even if you are being hit by some heavy-hitting turrets while falling off a cliff or bridge or in the air.
- Use this hull more as a support hull as you can hover (no pun intended) around the middle of the battlefield and support your teammates greatly.
You should now be almost all set to enter the battlefield with this medium hovering hull and have a lot of success in most of the battles you find yourself in!
_
That's it for this article, we hope this helped you to better understand the hull and how it works. We can't wait to see you all out there on the battlefield dominating over your opponents! If there are any other questions or concerns about this hull or article, feel free to comment below and we will try our best to further assist you.
Customer support service by UserEcho